With iris upgraded and as we continue to roll the upgrades out across the site, we are able to work on features that have long been requested. The first improvement we have been eager to get out to you has been “no-fuss” video tracking and we’re pleased that we are able to roll out this enhancement on the Adult and Basic Life Support pages. With this post, we would like to run you through some of the details on why we implemented this new feature, what this means for learners and how course admins can make use of it.
Why did we implement this?
Video is one of the most consumed content on iris. Creating videos is one of the most efficient and timely ways to get learning out there while at the same time being easy to consume on nearly any device. In light of all of this, it stands to reason that course admins, SMEs and learners alike have been asking for a better way to track video consumption.
In the past, we implemented an experimental solution to track video completions. This solution proved to have too many counter-intuitive user interface problems for some of our users. This led us to make use of the less elegant checkbox method to demonstrate video completion you may be familiar with now.
Now that iris is upgraded, we are able to use a new plugin called VideoTime to make both adding and tracking video content an easier and smoother experience.
What has changed for me as a learner?
A lot! From needing to ensure you click a submit button or to remember to check a box, you’ll now simply need to watch videos. The rest happens in the background.

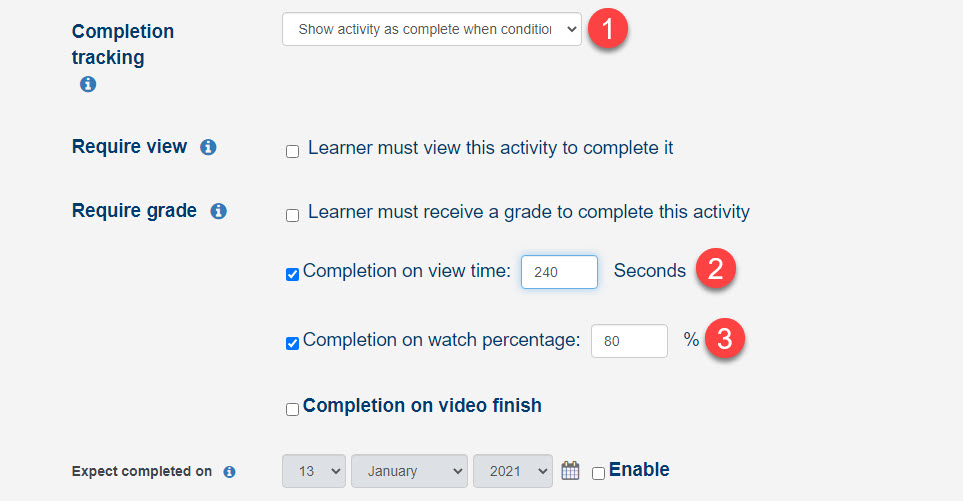
Each video added to iris from now on can track two pieces of information: the amount of time you spent watching a video and the portions of that video you have watched.
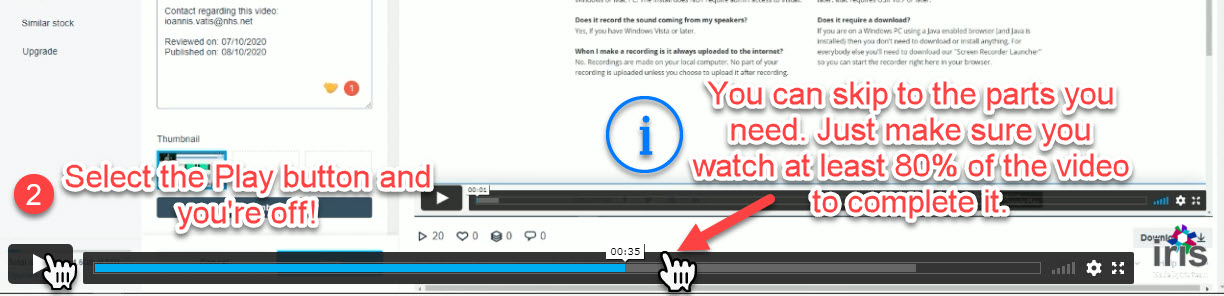
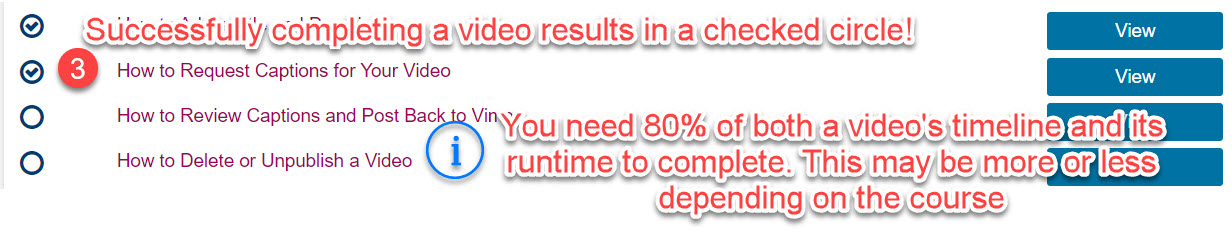
As a standard, we recommend course admins to set these two tracking points to 80%. Let’s take a 5-minute video as an example. It would be set so that in order to complete it you would need to view at least 80% of its content and spend 240 seconds (80% of its running time) watching it. Once both those requirements are satisfied, you should see a checkmark in the circle on the left of the video.
This enables you to watch the parts that are important if you don’t have that much time to spend on training. It is also more flexible for when you are repeating a course for certification purposes.
We use 80% as a standard. However, we always leave completion requirements to the discretion of Educators. Therefore, some videos may require more or less viewing time.
How do I use this as a course admin/lead?
Adding a video to your iris course page is a far simpler process thanks to the VideoTime plugin. All you will need is the Vimeo link to the video itself. You then click on the “Add activity or resource” option on your course page and scroll down until you find the VideoTime activity.
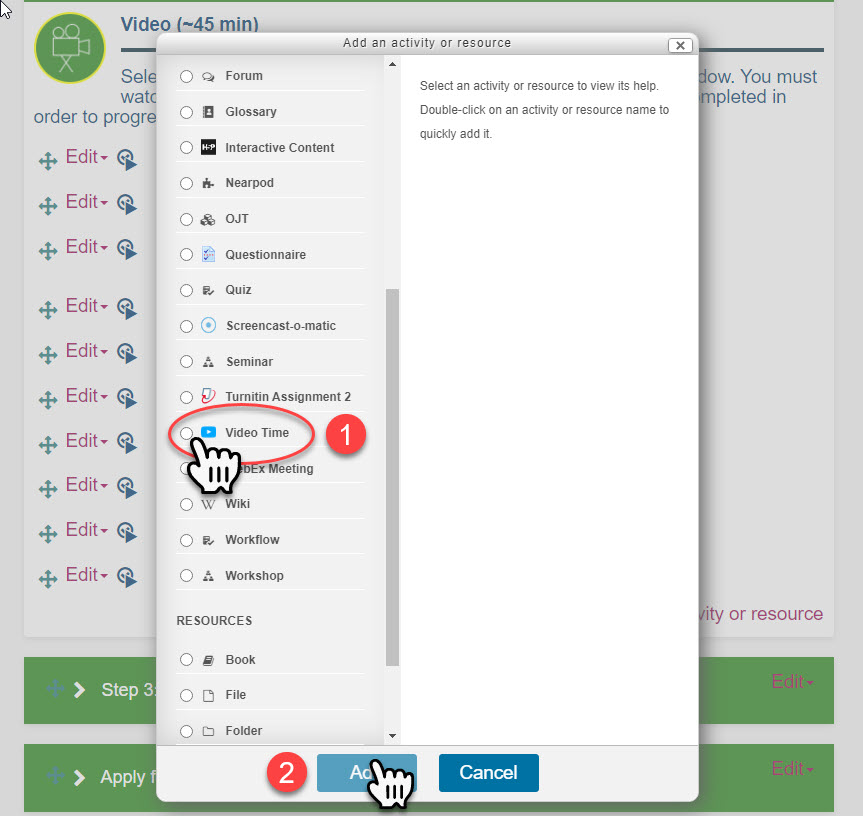
Select it and you will be taken to its settings where you can paste your video link, give the activity a title and set your completion requirements.
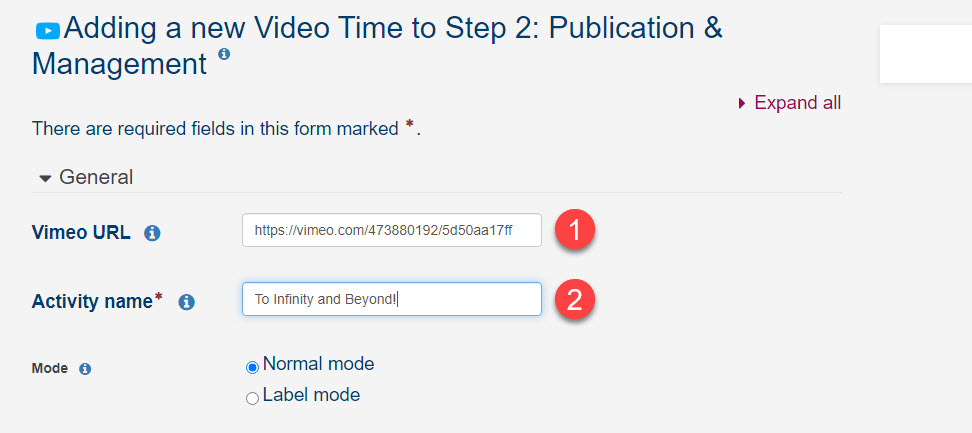
Using the 5-minute video example above, you need to set the “Completion on watch percentage” to 80% and the “Completion on view time” to 240 which is 80% of 5 minutes.
We recommend setting both of these to the same amount to avoid confusing learners.
At the moment, VideoTime only accepts links from Vimeo. If your video is from an external provider and located on another platform, you will need to contact the iris team to discuss options.
The VideoTime feature is now being used as a default on all new courses. If you have a course page that has video and would like to update them with VideoTime, please contact ioannis.vatis@nhs.net either via e-mail or Teams to get you up and running. Also, remember to follow us on Twitter @BSUH_iris or to join the Education and Knowledge group on Workplace to get the latest iris updates.